
Nov . 10, 2024 16:28 Back to list
Instruction Guide for Installing Famous Husky Fifth Wheel Hitch
Installing a Famous Husky Fifth Wheel A Comprehensive Guide
Fifth wheel trailers are a popular choice among RV enthusiasts for their stability and spacious interiors. The famous Husky brand offers top-quality fifth wheel hitches that are lauded for their durability and ease of installation. If you’re considering towing a fifth wheel trailer with your truck, understanding the installation process is essential. This article will guide you through the installation of a Husky fifth wheel hitch in a clear and concise manner.
Preparation Before Installation
Before diving into the installation process, gather the necessary tools and materials. You will typically need
- A Husky fifth wheel hitch kit - Drill and bits - Wrenches and sockets - Torque wrench - Measuring tape - Level - Safety glasses - A friend to help (optional but recommended)
Ensure you have a clean workspace and that your truck is parked on a level surface. It’s advisable to consult the specific installation instructions included in the Husky hitch kit, as there may be variations based on different truck models and hitch designs.
Step 1 Positioning the Hitch Components
Begin by positioning the mounting brackets inside the truck bed. The placement will depend on your truck's make and model, along with the specific fifth wheel hitch you are installing. Most Husky systems require the brackets to be mounted beneath the bed, aligning with the truck's frame for optimal stability.
Using your measuring tape, find and mark the mounting holes on the truck bed according to the instructions. These points will help you determine where to drill once you secure the brackets in place.
Step 2 Drilling the Holes
Using a drill, carefully create holes at the marked points on your truck bed. It’s crucial to wear safety glasses during this process to protect your eyes from metal shavings. After drilling, make sure to clean any debris from the area. You can use a vacuum or a cloth to ensure the surface is clear, as debris may interfere with the installation.
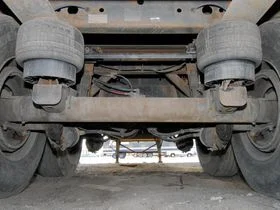
famous husky fifth wheel installation instructions
Step 3 Attaching the Brackets
Once the holes are drilled, it’s time to install the mounting brackets. Position the bracket over the drilled holes and insert the provided hardware through the holes to secure it tightly against the truck bed. A friend can be helpful here to hold the brackets in place while you work.
Using a torque wrench, tighten the bolts according to the manufacturer's specifications. This step is crucial to ensure that the brackets are securely fastened and can withstand the stresses of towing. Double-check that everything is snug and properly aligned.
Step 4 Installing the Fifth Wheel Hitch
With the brackets securely in place, it’s time to install the fifth wheel hitch itself. The hitch typically consists of the main body and a couple of side arms that attach to the brackets you’ve just installed. Position the hitch over the mounting brackets and align the necessary bolts and pins as per the instructions.
Again, use the torque wrench to ensure all connections are tight and secure. Taking time to check these connections will help prevent any unforeseen issues while towing.
Step 5 Final Adjustments and Test
After the installation, it’s important to perform final adjustments. Use a level to ensure that the hitch is balanced and aligned correctly. This ensures a smooth towing experience and minimizes wear on your truck and trailer.
Once everything is in place and tightened, take a moment to review the entire installation. It’s a good idea to double-check all bolts, brackets, and settings before you hit the road.
Conclusion
Installing a Husky fifth wheel hitch is a straightforward process that can greatly enhance your towing capabilities. By following these step-by-step instructions and adhering to safety measures, you’ll be well-equipped to install your hitch confidently. Remember that regular maintenance and checks on your hitch setup are essential for safe towing. Enjoy the freedom of the open road and the adventures that come with it!
-
Westside Park Richland MS Best Discounts & Family-Friendly Fun
NewsMay.15,2025
-
Triple T Truck Parts in Wilmington, NC High-Quality & Discount Deals
NewsMay.15,2025
-
Best Drawbars for Heavy-Duty Use Durable & Discounted Options
NewsMay.14,2025
-
Best Quicke Loaders Heavy-Duty Performance & Exclusive Discounts
NewsMay.14,2025
-
Best Trailer Landing Legs Heavy-Duty Design & Discounts
NewsMay.13,2025
-
Sanel Auto Parts Jaffrey NH Premium Quality & Best Deals Today
NewsMay.13,2025