
Oct . 02, 2024 14:35 Back to list
oem adjusting fifth wheel on semi
Adjusting the Fifth Wheel on a Semi An OEM Guide
When it comes to operating a semi-truck, one of the most critical components affecting both performance and safety is the fifth wheel. This pivotal part serves as the connection between the truck and its trailer. Proper adjustment of the fifth wheel is essential for optimal handling, fuel efficiency, and tire wear. For Original Equipment Manufacturers (OEMs) and fleet managers, understanding how to adjust the fifth wheel correctly is key to ensuring that vehicles operate at peak efficiency.
Understanding the Fifth Wheel
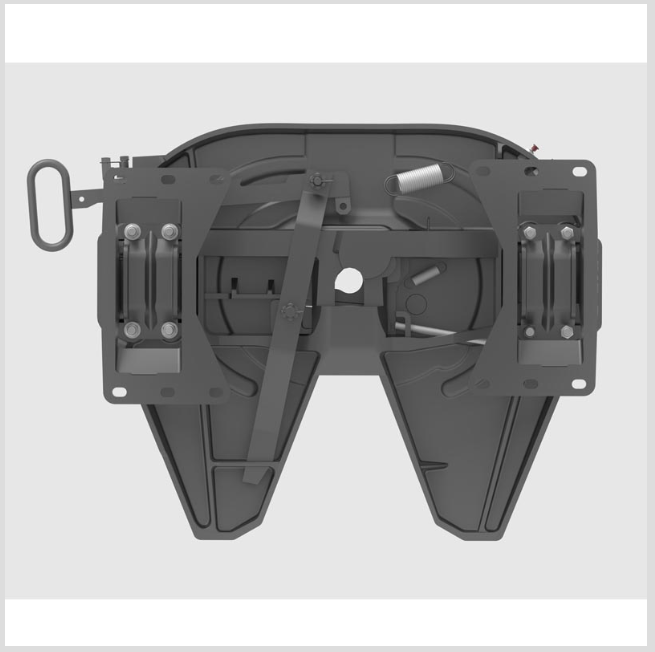
The fifth wheel is a device mounted on the frame of the truck, designed to secure the trailer. It allows for a pivot point that provides stability and maneuverability, particularly when navigating tight turns. A misaligned fifth wheel can lead to a host of issues, including uneven tire wear, increased strain on the truck's braking system, and compromised safety when driving.
Signs That Adjustment is Needed
1. Unusual Tire Wear If you notice that the tires on either the truck or trailer are wearing unevenly, it could be a sign that the fifth wheel is not properly adjusted.
2. Handling Issues If the truck exhibits unusual handling characteristics, such as pulling to one side or feeling unstable during turns, it may be time to adjust the fifth wheel.
3. Noise and Vibration Excessive noise or vibrations coming from the coupling mechanism while driving can indicate misalignment.
Steps to Adjust the Fifth Wheel
Tools Needed
Before you begin the adjustment process, ensure that you have the necessary tools on hand, including
- Wrenches and a socket set - A torque wrench - A measuring tape - Safety gear (gloves, goggles)
Step 1 Safety First
oem adjusting fifth wheel on semi
Ensure that the truck is parked on a level surface, the engine is turned off, and the parking brake is engaged. Secure the trailer to prevent any movement during the adjustment process.
Step 2 Inspect the Fifth Wheel
Visually inspect the fifth wheel for any signs of wear or damage. Look for cracks or bends, and ensure that the locking mechanism is functioning correctly. Address any damage before proceeding.
Step 3 Measure the Height
Using a measuring tape, measure the height of the fifth wheel from the ground to the top of the fifth wheel plate. Compare this measurement to the manufacturer's specifications for your specific truck model.
Step 4 Adjust the Height
If the height is incorrect, you will need to adjust it. Typically, this involves loosening the bolts that secure the fifth wheel and either raising or lowering it to meet the desired height, according to OEM specifications.
Step 5 Tighten and Torque
Once you have achieved the correct height, tighten the bolts securely. Use a torque wrench to ensure that they are tightened to the manufacturer's recommended settings.
Step 6 Test the Adjustment
Finally, take the semi out for a test drive. Pay attention to the handling, braking, and any noises. If everything feels right, then your adjustment is successful.
Conclusion
Adjusting the fifth wheel on a semi-truck is not just a maintenance task; it is a fundamental aspect of truck operation that affects safety and performance. By following OEM guidelines and regularly checking the fifth wheel’s alignment, fleet managers can ensure that their trucks are running smoothly and efficiently. Proper adjustment contributes to longevity, improved fuel economy, and enhanced safety on the road, making it a priority for all trucking operations.
-
Best Drawbars for Heavy-Duty Use Durable & Discounted Options
NewsMay.14,2025
-
Best Quicke Loaders Heavy-Duty Performance & Exclusive Discounts
NewsMay.14,2025
-
Best Trailer Landing Legs Heavy-Duty Design & Discounts
NewsMay.13,2025
-
Sanel Auto Parts Jaffrey NH Premium Quality & Best Deals Today
NewsMay.13,2025
-
Locking Fifth Wheel Quotes Durable Mechanism & Device Pricing
NewsMay.13,2025
-
Extreme Fifth Wheels Premium Durability & Off-Road Performance
NewsMay.12,2025